How to Improve Real Estate Photos: 12 Fixes That Work
Published on November 13, 2026
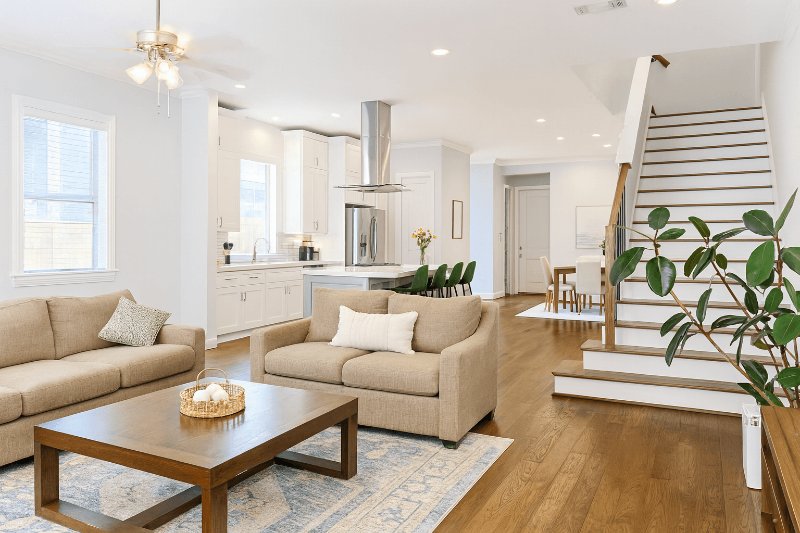
Most listing photos are not bad because of the camera. They are bad because the room was dark, the phone was tilted, and nobody had time to fix it before the listing went live. All of that can be improved, either while you shoot or afterwards.
This guide is in two parts: what to do before you press the button, and how to improve real estate photos you have already taken.
Part 1: improve the photo before you take it
1. Clear the room
Remove what a buyer does not need to see: bins, cables, drying racks, fridge magnets, toiletries, pet bowls, cars on the driveway. Five minutes per room. A clear surface makes a room look larger than any lens does.
2. Shoot in daylight, with every light on
Open all blinds and curtains and turn on every lamp, including the ones under kitchen cabinets. Late morning to mid afternoon works for most interiors. If one side of the house gets direct sun, shoot those rooms when the sun has moved off the windows, so you do not get hard bright patches on the floor.
3. Hold the phone level, at chest height
Tilting the phone up or down makes walls lean. Hold it straight, at about 4 feet (1.2 m) from the floor, and turn on the grid in your camera settings so you can line up a door frame or a wall edge with it. Lower than eye level also shows less ceiling and more room.
4. Stand in a corner or a doorway
Shooting from a corner shows two walls and the floor between them, which tells the buyer how the room is laid out. Take landscape photos. Portals crop listing photos to a horizontal frame, and a vertical photo loses most of the room.
5. Use the standard lens, not the widest one
The ultra wide lens (0.5x) stretches furniture at the edges and makes rooms look like corridors. Use 1x where the room allows it, and 0.5x only in bathrooms and small rooms where you cannot step back.
6. Take more than you need
Two or three angles per room, plus the front of the house, the garden and the view. It takes ten extra minutes and saves a second visit.
Part 2: improve real estate photos you already have
You do not always get to reshoot. The owner sent the photos, the tenant is still in, or it rained. These are the fixes that change a photo most, in order of impact.
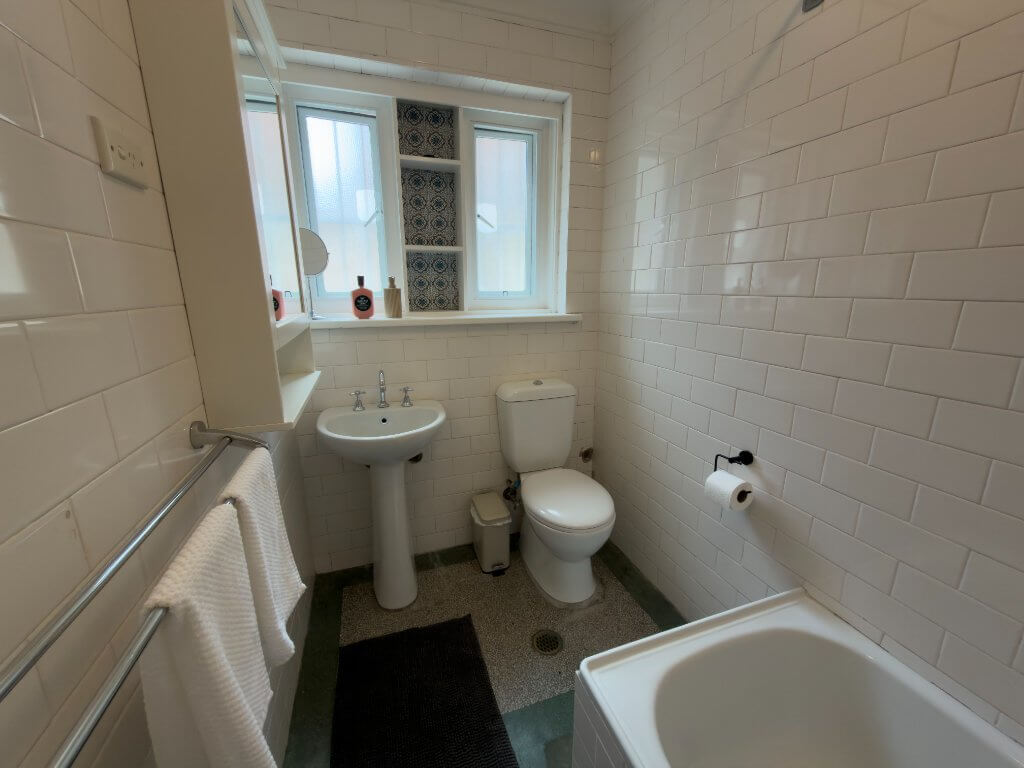 Before
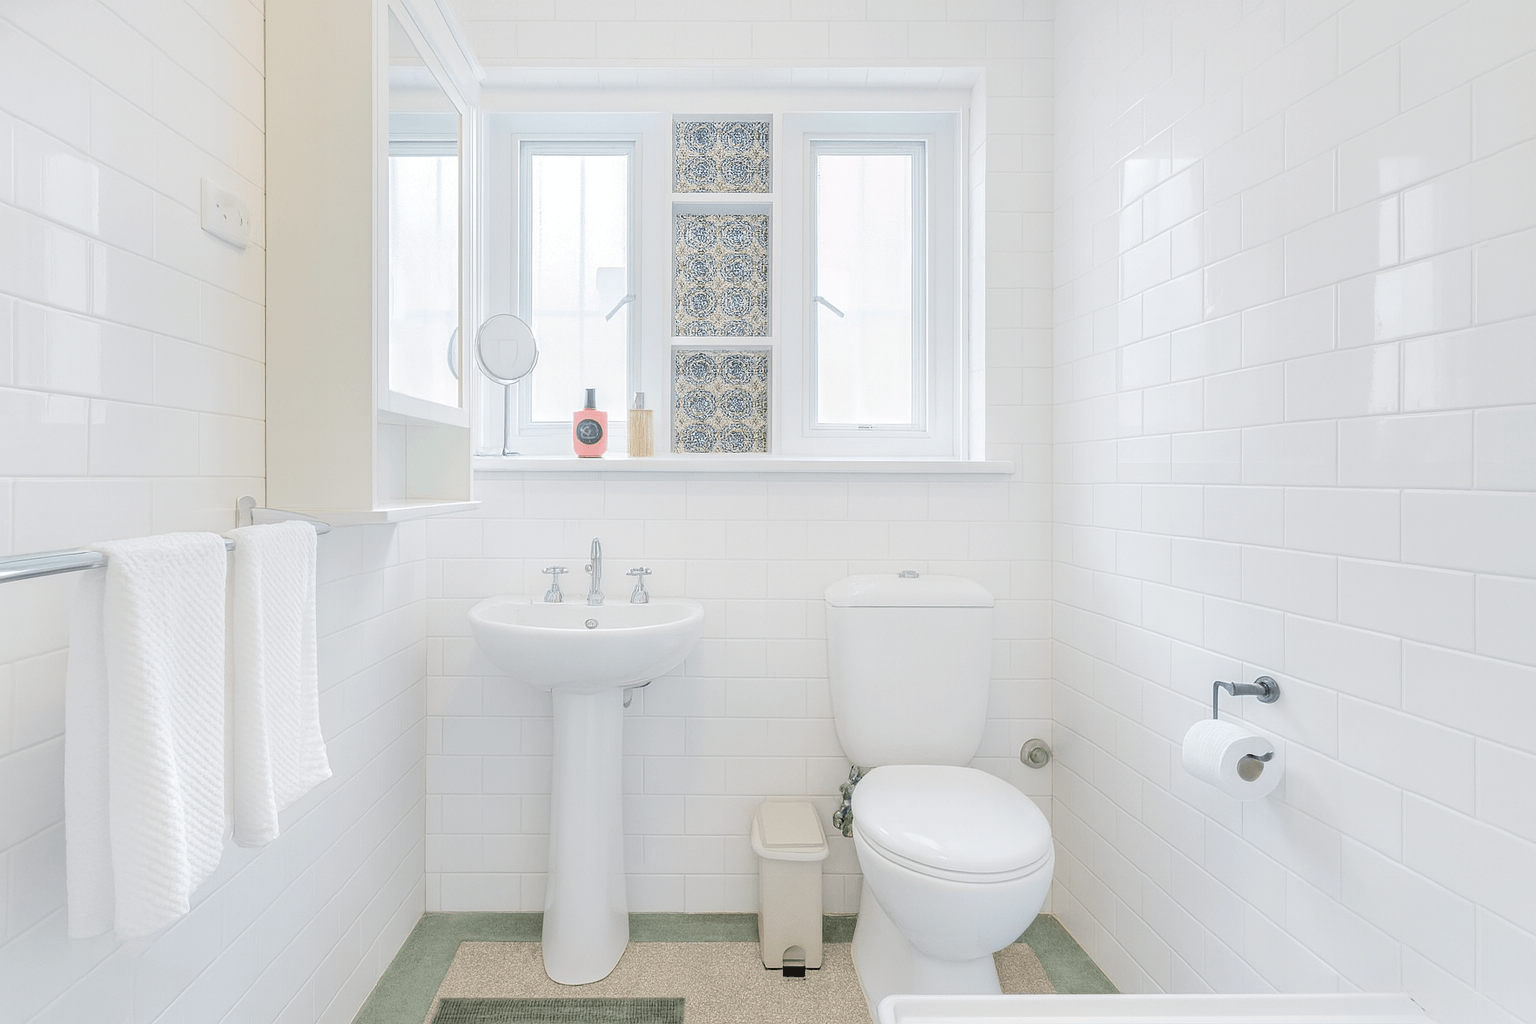 After
The same photo before and after correcting exposure and white balance.
7. Fix the exposure
Phones expose for the window, so the window looks fine and the room goes dark. Lifting the shadows and bringing the window back down is the single biggest improvement on most interior photos. More in our lighting guide.
8. Fix the colour
Indoor bulbs turn white walls yellow, and shade turns them blue. Correcting the white balance makes walls white again and wood, tiles and fabrics the colour they are in person.
9. Straighten the verticals
If walls and door frames lean, the photo looks amateur even when everything else is right. Perspective correction makes vertical lines vertical again.
10. Replace a grey sky
For exterior photos, a grey sky makes the whole house look flat. Swapping it for a blue one is accepted practice in real estate, as long as nothing else about the property or the view changes. See what works with sky replacement.
11. Remove what should not have been in the shot
A bin by the door, a cable across the floor, a car in front of the house. Removing temporary objects is fine. Do not remove anything permanent, such as a power line, a crack or a neighbouring building, because the buyer will see it at the viewing. See how to remove objects from listing photos.
12. Stage the empty rooms
Empty rooms are hard to read in a photo: buyers cannot judge the size or picture a use for the room. Virtual staging adds furniture to the photo. Label staged photos as virtually staged in the listing. Many MLSs require it.
Three ways to do the editing
| Do it yourself | Human editing service | AI photo enhancer | |
|---|---|---|---|
| Tools | Lightroom, Snapseed, your phone's editor | An editing company | A web tool such as ProntoPic |
| Time per photo | 5 to 15 minutes once you know how | Usually back the next day | About a minute |
| Skill needed | Some. Perspective and window fixes take practice | None | None |
| Best for | People who enjoy editing | Complex retouching and floor plans | Getting a listing online today |
What you should not edit
Improving a photo means fixing how it was taken, not changing the property. Do not hide damage, do not make rooms look larger than they are, and do not add features the home does not have. Listing photos are advertising, so they have to be truthful, and a buyer who feels misled at the viewing is a lost buyer anyway.
The fast way
ProntoPic does steps 7 to 11 in one click. You upload the photo, it detects whether it is an interior or an exterior, and it corrects exposure, colour, perspective, sky and clutter. You see the before and after side by side before you download. It costs $1.50 per photo with no subscription, and the first 2 photos are free with no card.
See how agents use it, or read what AI can and cannot fix in a listing photo.
Questions
How can I improve real estate photos taken with a phone?
Hold the phone level at chest height, use the 1x lens, shoot in daylight with all lights on, then correct exposure, white balance and verticals afterwards. Those three corrections account for most of the difference between a phone photo and a professional one.
Can I improve photos the seller sent me?
Yes. Exposure, colour, leaning walls and grey skies can all be corrected on an existing JPEG. What cannot be fixed afterwards is a blurry photo or a bad angle. For those, ask for a new photo.
How many photos should a listing have?
Enough to show every room once and the main rooms twice, plus the exterior. For most homes that is 15 to 25 photos. Lead with the strongest exterior or living room photo, because that is the one shown in search results.